Table of Contents
Fun with Text and Shaders
Summary
In this tutorial, we're going to import a font to be used with your Orx game, and play some advanced tricks with it using our favorite image editor and some shaders! You can find the source code in this git repo, the commits in that repo follow the order of the tutorial sections.
Importing the Font
We start by downloading a font (.ttf) to be used with our game. For this tutorial, I've chosen the free Pleasantly Plump Font.
- We put it into the same folder with the orxFontGen tool that resides in
<Your Orx Home>/tools/orxFontGenfolder - Create a file called Characters.txt in the same folder and write the following in it:
ABCDEFGHIJKLMNOPQRSTUVWXYZ !?,.
- Call the following terminal command in that folder:
./orxfontgen -t Characters.txt -s 40 --font "PLUMP.ttf" -o plump -a
Now, let's see what we've got:
- A plump.ini file that contains:
[plump]
CharacterList = " !,.?ABCDEFGHIJKLMNOPQRSTUVWXYZ"
CharacterWidthList = 19 # 15 # 10 # 11 # 30 # 36 # 35 # 33 # 36 # 29 # 29 # 34 # 36 # 19 # 33 # 35 # 31 # 41 # 37 # 36 # 33 # 36 # 34 # 31 # 32 # 38 # 35 # 51 # 36 # 36 # 33
CharacterHeight = 40.000000
CharacterSpacing = (2, 2, 0)
Texture = plump.png
- And a plump.png file that looks like (Don't try to save that image and use it in your game, I've added a background to it so that it's visible in this page. If you're too lazy to call the command above, download the image from here instead):
These two files are all you need to use this font in your game, copy them to somewhere your game can find them. Important note: plump.ini file indicates that the font Texture is plump.png, which means that plump.png is at the root of your data folder!
Now we can use this font in our game, just add the following somewhere in your .ini files:
;We need to include the generated font .ini file
@plump.ini@

[TextObject]
Graphic = TextGraphic

[TextGraphic]
Text          = TextWithCustomFont
Pivot         = center

[TextWithCustomFont]
String = HELLO WORLD!!
Font = plump ; This is where we tell Orx to use the custom font
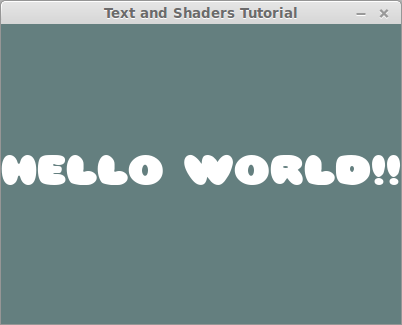
Here's the result:
Playing with the Font
Now the fun begins! No one says that we're not allowed to play with plump.png, so we're just going to edit it with GIMP to add some borders to the text! This is not an image manipulation tutorial, so I'll just summarize:
- Open
plump.pngwith GIMP - Use “Select by Color” tool to select the transparent areas
- Selection→Invert Selection
- Selection→Shrink Selection 1 pixel
- Edit→Stroke Selection
Anyway, the result is (The download link as before):
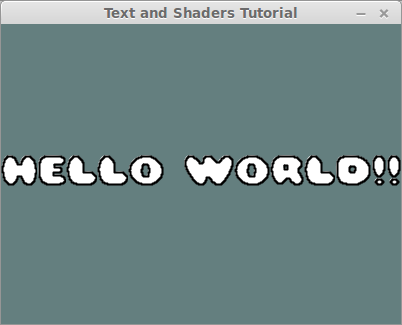
And this is how it looks in the game:
Nice! This is the code so far.
Changing the Border and Fill Colors Independently
See, this tutorial is about things nobody told us we couldn't do :)
At this stage, we want to be able to change the text border and fill colors independently, but we've baked the border color into our font texture. This is where our custom shaders come into play.
Now, take a look at the original generated font texture again:
It's a 32 bit RGBA image that just conveys the information of a 1bit image! So much wasted potential. In fact, we could just drop all the color values and fulfill the job of the font texture with just the alpha channel. Let's do that; open the original plump.png in GIMP and paint it all black (Note that I didn't bother myself with the transparency image this time since the image is visible as it is, so you can just download this image if you like):
Now, if we run the game, the text will appear in black, but that's not what we want; we want it to function as before, ignoring the texture color, so we need to write a custom shader that will do that:
[TextObject]
Graphic = TextGraphic
ShaderList = TextShader ; NEW
Color = (255,255,255) ; NEW

[TextShader]
ParamList = texture
Code = "
void main() {
    // Get the texture value for the current pixel
    vec4 tex = texture2D(texture, gl_TexCoord[0].xy);

    // Set the pixel color value to the object's color value
    gl_FragColor.rgb = gl_Color.rgb;

    // Set the pixel alpha to the texture's alpha multiplied by the object's
    gl_FragColor.a = tex.a * gl_Color.a;
}"
And the output is exactly the same as before:
So, what did we gain by this? Now we have 3 color channels that we can do anything we want with!!! So we'll use the red channel to carry the border information. We'll edit plump.png the same way we did in the Playing with The Font section except that we'll be stroking with red:
If you run the game now, you'll see no trace of the border since we're ignoring the RGB of the texture now!
Let's improve our shader to take advantage of the border information:
[TextShader]
ParamList = texture # BorderColor ; We've added a new parameter
Code = "
void main() {
    // Get the texture value for the current pixel
    vec4 tex = texture2D(texture, gl_TexCoord[0].xy);

    // Here's the fun; We blend in the border color based on R channel
    gl_FragColor.rgb = mix(vec3(1.0), BorderColor, tex.r) * gl_Color.rgb;

    // Set the pixel alpha to the texture's alpha multiplied by the object's
    gl_FragColor.a = tex.a * gl_Color.a;
}"
BorderColor = (0,0,255) ; Let's make the border blue, just for fun.
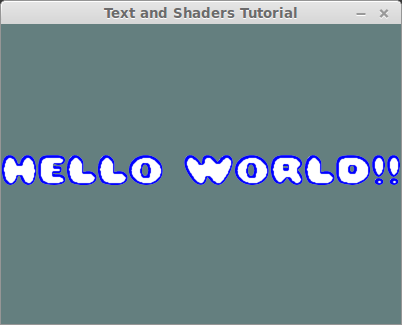
Here's the result:
Now we can change the text border color in config.
Illuminating the Text with a Light!
So far, we've been using the red and alpha channels of the font texture, we still got two more color channels that we can have a lot of fun with :) One application I could think of for utilizing those two channels was illuminating the text as if it were embossed.
To that end, we're going to edit plump.png in GIMP to occupy the green and blue channels with the surface normals of an embossing. If you're really interested in how we're going to do this, expand the following section, but otherwise, you know I'm going to give you the result anyway :)
Now we have a new plump.png that has the text border at its R channel, surface normal X on its G channel and surface normal Y on its B channel; here's how it looks:
Now we need to make use of these new channels in our texture shader:
[TextShader]
ParamList = texture # BorderColor # LightPos # LightColor
Code = "
void main() {
    // Get the texture value for the current pixel
    vec4 tex = texture2D(texture, gl_TexCoord[0].xy);

    // Here's the fun; We blend in the border color based on R channel
    gl_FragColor.rgb = mix(vec3(1.0), BorderColor, tex.r) * gl_Color.rgb;

    // Let's derive the surface normal from the green and blue channels
    vec3 normal = normalize(vec3(tex.g-0.5, tex.b-0.5, 0.5));

    // Let's find the unit vector pointing from this pixel towards the light
    vec3 light_dir = normalize(LightPos-gl_FragCoord.xyz);

    // The illumination of a Lambertian surface is the dot product
    // of the surface normal and the unit vector towards the light
    float illumination = max(0.0, dot(normal, light_dir));

    // Let's apply the light color and the illumination
    gl_FragColor.rgb *= LightColor * illumination;

    // Set the pixel alpha to the texture's alpha multiplied by the object's
    gl_FragColor.a = tex.a * gl_Color.a;
}
"
BorderColor = (0,0,255) ; Let's make the border blue, just for fun.
LightPos = (200,150,100) ; The light is at the center of the screen
LightColor = (1,0.7,0.7) ; Reddish light source
Let's see how that looks:
Great! Now a reddish light source is illuminating our greeting text.
BONUS! Interactive Light
I've finally gone one step further and downloaded a light bulb image to create a light bulb object that follows the mouse. The text shader's light source also follows the mouse resulting in a nice interactive embossed text illumination demo. The things I've done for this step is out of the scope of this tutorial, but the code is in the repository. Here's a video:
This is all the code, and this is what we needed to add to make the demo interactive.


